Configure Your Vercel Project to Work with Your Namecheap Domain
Search for a command to run...
No comments yet. Be the first to comment.
So You Used ExamPro to Pass the AZ-900, AZ-104, and AZ-305... Now What?

So You Used ExamPro to Pass the AZ-900, AZ-204, and AZ-400... Now What?

If you have been following any popular developer creator on social media in the past few years. It would probably be safe to assume that you already know, the only way someone can possibly get hired in this industry is by picking up React with Typesc...
Coding Collaboratively: Why the GitHub Foundations Certification Matters

Getting Started with the Cloud

If you've chosen Namecheap for your domain and are using Vercel for deploying your app, linking the two can seem daunting. However, it's a straightforward process that can significantly boost your online presence. This guide will walk you through the steps to connect your Namecheap domain with your Vercel-deployed app, ensuring a smooth and successful integration.
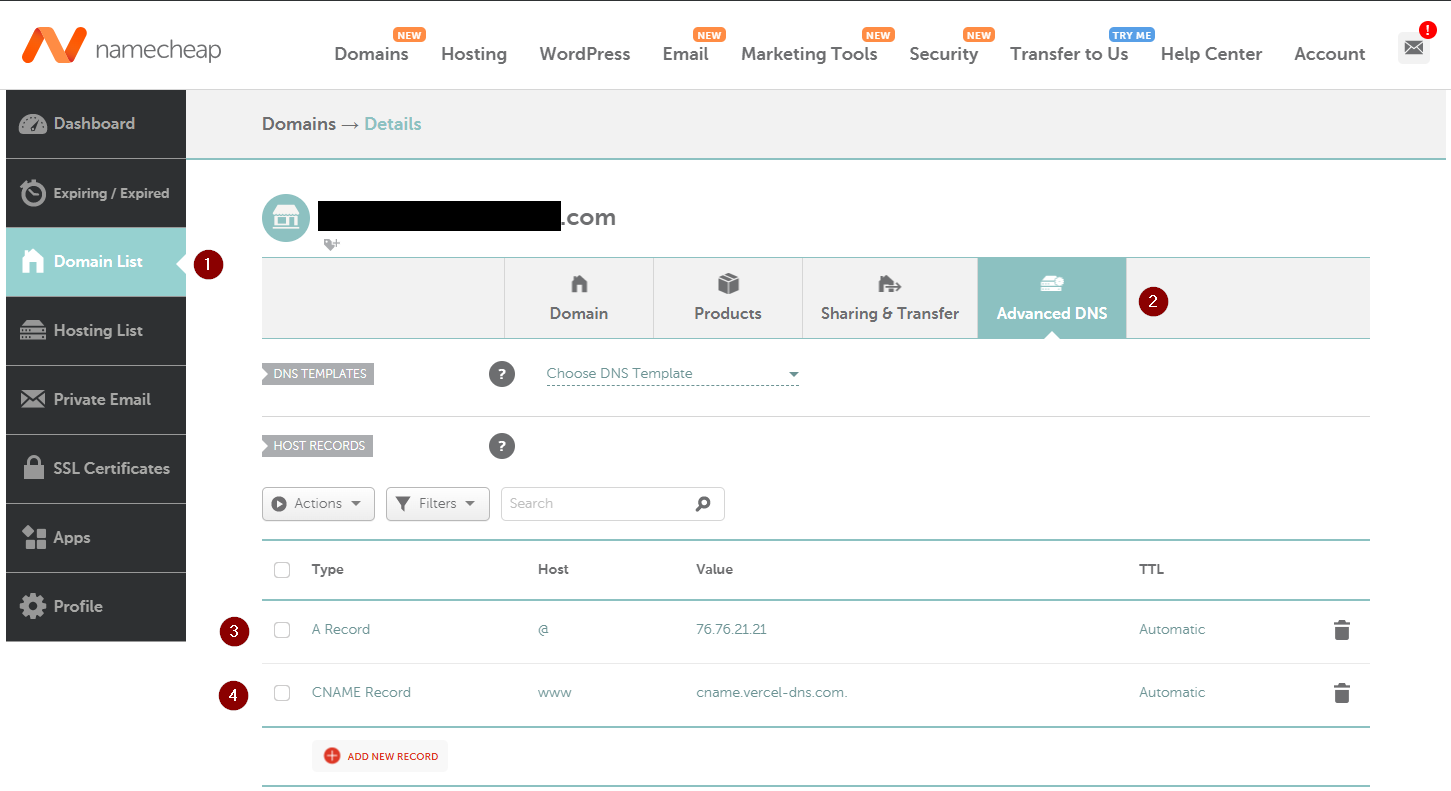
First, log in to your Namecheap account. On the dashboard, locate the side panel and click on 'Domain List.' This section will display all the domains you've purchased through Namecheap. Find the domain you wish to connect with your Vercel app.
Once you've selected your domain, it's time to delve into the DNS settings. Click on 'Advanced DNS' to access the domain's DNS configuration. This area allows you to modify how your domain connects to the internet and points to different online services, including your Vercel app.
The next step involves adding a new DNS record. Click to add a new record and select 'A Record' for the type. In the 'Host' field, enter '@' to denote the root domain. For the 'Value' field, input '76.76.21.21' - this is the IP address that will direct your domain to Vercel.
Finally, you need to add a CNAME record. Choose 'CNAME Record' for the type. Set the 'Host' as 'www' to cover the www version of your domain. In the 'Value' field, enter 'cname.vercel-dns.com.' This ensures that both your root domain and the www subdomain correctly point to your Vercel-deployed app.
After configuring your Namecheap domain, the next step is to set up your Vercel project to recognize and use this domain. This process allows your Vercel-deployed app to be accessible via the domain you've set up on Namecheap. Here's how you can do it:
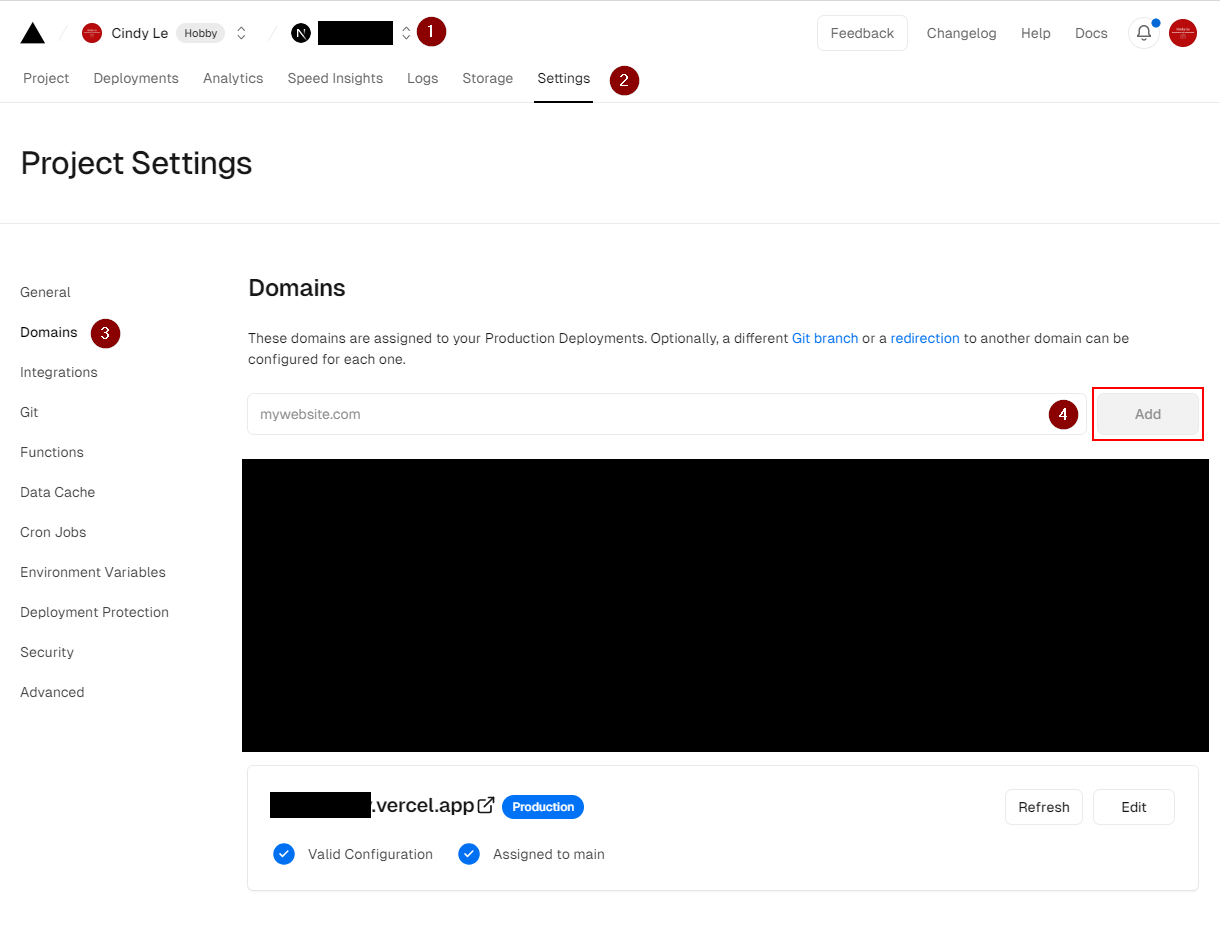
Log in to your Vercel account and head to the dashboard. Here, you'll see a list of your projects. Select the project that you want to connect with your Namecheap domain. It's essential to choose the correct project to ensure that your domain points to the right application.
Within your project dashboard, find and click on 'Settings' in the navigation menu. This section allows you to customize various aspects of your project, including domain management, which is crucial for our purpose.
On the left-hand side, you'll see a panel labelled 'Project Settings.' From here, select 'Domains.' This area is dedicated to managing domain-related settings for your project.
Now, you're ready to connect your Namecheap domain to your Vercel project. There should be a text field for adding a new domain. Enter your Namecheap domain name here. After inputting your domain, click on the 'Add' button. Vercel will then proceed to verify the domain and set up a connection.
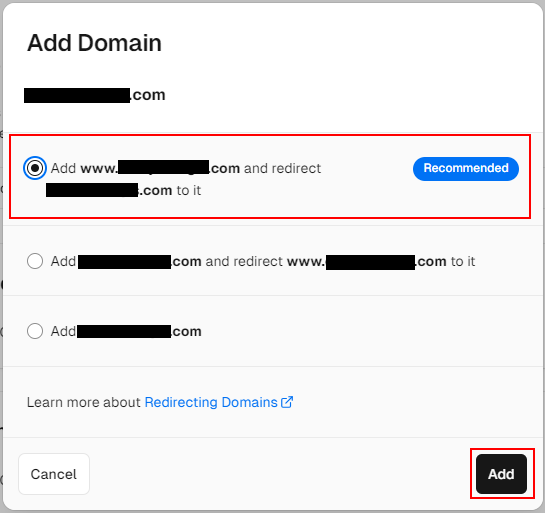
Vercel Recommends this setting so just click on "Add" in the pop-up module.
Finally, wait for the blue checkmarks to appear on your Vercel dashboard to complete the configuration. It shouldn't take more than 24 hours.